 Maslenitsa — i.e. Orthodox Fat Tuesday — is on February 28, and that means, it’s time to make blini, Russian sour crepes.
I am going to do something unorthodox (ha!) with this recipe. All recipes are written in a sort of shorthand, and quantities given are always approximate. The right way to cook is to look for the right flavor, color and texture, and that means not necessarily fixating on precise proportions. That is especially important with blini. I’m sorry, I couldn’t tell you how much flour you need. I just add flour gradually until I get the right consistency batter. So, get yourself plenty of flour and prepare to go by sight and feel, rather than by quantity. Also, the right environment is important for making blini, especially if you are making them with active yeast, so the recipe will devote some time to that.
CLASSIC BLINI
The recipe for classic blini may look intimidating, but trust me, it’s less complicated than it looks. You just have to remember two important things:
FIRST, everything (including the kitchen) must be at the right temperature — warm, but not too warm. If you have experience working with yeast, you understand why that is. If you’ve never worked with yeast —well — let’s just say, it’s a bunch of living organisms, and they are delicate. Once activated, they like their environment warm, wet and full of starch (including table sugar — you always want to start them off with something easier to break down), and if they are happy, they do the fermentation process that makes the batter rise and the blini nice and spongy. But if they are too cold, or it gets too warm, they die, and as with all living things, there is no reviving them. So make sure to keep them warm, happy and not dead (until the batter hits the skillet).
SECOND, when you fry a single blini, it takes about 10 seconds per side to cook, after which it begins to burn. Once cooked, a blin must be brushed with butter, or it will get dry and brittle. That means, you have to work very quickly, and you have to have a system for frying blini while brushing and finishing those already fried. No, you are not going to use a timer. I will tell you later in the recipe how to time yourself without fumbling with an additional device, and how to make sure you finish one blin while simultaneously frying the next.
If you get those two things right — and I will explain in detail how to do that — bliny will be easy.
Ingredients:
2 cups whole milk, warm
1 packet dry yeast (about 2 heaping teaspoons)
1 tbsp sugar
2 eggs at room temperature, beaten
1 tsp baking soda, neutralized with a few drops of vinegar
all purpose flour
generous pinch of salt
oil with a high smoking point, such as sunflower, safflower or a coconut blend
cubes of butter or margarine, kept chilled
Tools
Large bowl
Whisk
10” non-stick pan, preferably with a metal or wooden handle, because the pan will get VERY hot and stay hot for a long time.
4-oz soup ladle
1 large platter
1 fork
1 spatula
Preparation
- Warm the milk, but not to the point where it’s hot. Remember — your fingers are actually relatively less sensitive to heat than you need to gauge the temperature here. Warm up more milk than you need, and then test it by holding some in your mouth. If it’s comfortingly warm, but you can hold it in your mouth without a burning sensation, it’s just right.
- Preheat the oven slightly, to about 80F, and certainly not more than 90F. Turn off the heat and keep the oven closed.
- Make sure the ambient temperature in the kitchen is very warm, 75 or higher.
- Make sure the eggs are at room temperature (I know I’m repeating myself here, but it’s important to get the yeast to work right).
- Make sure the bowl is either warm or at ambient temperature — but not hot enough to cook the yeast. Again, sorry for repeating myself, but I want to make sure nothing gets overlooked.
- Okay, now that everything is warm but not too warm, you are ready to start.
Instructions
- Whisk together warm milk and sugar, sift in about 1-2 tbsp flour and whisk again until blended. Add yeast. Stir gently.
- Put the bowl into your slightly warm (but not actively heating!) oven, close the door and let stand 20 minutes.
- Take the bowl out of the oven — if the yeast are working properly, the mixture should have risen considerably. It will sag back down once you start blending in all the other ingredients; don’t worry about, as long as you keep the temperature warm and constant, it will rise again.
- Whisk in eggs, a pinch of salt, and the baking soda neutralized with vinegar. Don’t whisk too vigorously — just enough to blend. Again, don’t worry about the level of the liquid falling.
- Begin sifting in flour 1 tbsp at a time, whisking gently between additions. Continue adding flour until you get the right consistency. You have the right consistency when the batter is like a smooth, thick sauce. Scoop a ladle of it and pour back into the bowl. Observe the texture. If it’s falling in clumps, it’s too thick. If it’s falling like a ribbon, it’s too thick. If it’s falling like smooth gravy, forming a funnel in the bowl without droplets or splashing, then it’s just right. If it splashes, the batter needs more flour.
- Once you get the batter right, put it in the oven again for about 5 minutes.
- Brush the skillet very lightly with oil, and heat over medium-high heat for a few minutes. Remove the batter from the oven and whisk in 1 tbsp of oil. Stick a fork into a chilled cube of butter. You are now ready to fry the blini.
- Fill the ladle to about 3/4 capacity and pour onto the heated skillet in a thin stream, while tilting the skillet with your other hand, making sure that the batter covers the surface of the skillet evenly. Note: the first blin never comes out right. We even have a proverb in Russian — the first blin is always a clump — so if it looks more like a mishapen piece of protoplasm than something edible, don’t be discouraged. It can take up to 3 bliny until the skillet is heated just right, and all the excess fat has been absorbed, before you start getting the right blini.
- Now, for the “system” I mentioned earlier. Once you’ve added batter to the skillet (let’s call it Blin 1), and it’s distributed evenly all over its surface, it will take about 10 seconds before you have to flip it. You know it’s time to flip it when the surface of the blin no longer looks runny. Flip it with a spatula and count to ten. Remove the Blin 1 to the holding platter. Add the next 3/4 ladle batter to the skillet and tilt it to distribute (Blin 2). Start counting to ten. While counting to ten, quickly and lightly brush Blin 1 with the butter cube, taking care to butter the edges. You must finish buttering it within 10 seconds. Return the butter cube with its fork to its chilled dish, flip Blin 2 on the skillet, count to 10. Remove Blin 2 from the skillet and place it on top of Blin 1. Add more batter to the skillet and start counting to ten (Blin 3). While counting to ten, brush the surface of Blin 2 that’s on the platter with the butter cube. Then flip Blin 3, count to ten. Follow the same protocol: add batter to skillet — brush the previous blin with butter while counting to ten — flip the blin in the skillet — count to ten — remove the blin to the holding platter. Once you get the hang of it, it’s almost instinctive. Stack the blini in a column. Continue until you’ve used up all the batter. You will not need to add more oil to the skillet.
To serve:
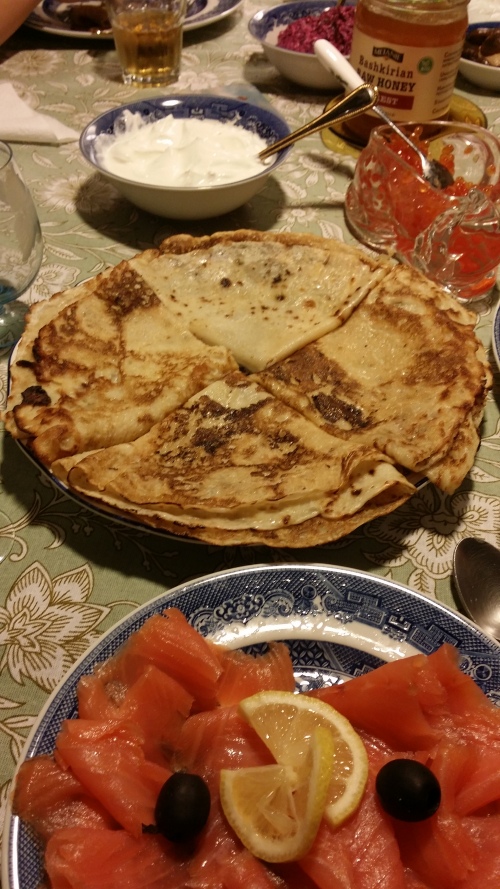
Blini are served warm as a stack, with toppings such as sour cream, caviar, gravlax, mushroom gravy, etc served on the side. For sweet bliny, the classic combination of toppings is sour cream and honey.
To eat, use a fork to pull up one side of a blin, and fold it in half, then fold it once more (so it’s a quarter) and transfer to an individual plate. Heap with your preferred toppings.
Q&A:
Q: Why should I use butter cubes to butter blini after they are fried? Why not just brush them with melted butter?
A: Because you will use too much butter. Blini are spongy, which makes brushing them difficult. They also absorb butter like, well, a sponge. Brushing them with melted butter, as opposed to a chilled butter cube, makes them too greasy.
BUTTERMILK BLINI
If you use buttermilk instead of milk, then add baking soda without neutralizing it with vinegar. The acid in the buttermilk will neutralize it.
QUICK BEER-BASED BLINY
Beer replaces the yeast here. Quick blini are not quite as luxurious as the classic kind, but the ease of preparation makes up for it. Combine 1 cup beer with 1 cup milk for this recipe and skip the yeast. Make sure the beer is warm. You also need not let the batter rise.
BUCKWHEAT BLINI
Buckwheat flour has an incomparable chocolatey aroma and beautiful color. Buckwheat blini go particularly well with seafood, especially when the seafood is combined with a delicate cream sauce. The thing to keep in mind, though, is that buckwheat does not have gluten, and gluten is absolutely essential to making blini spongy, elastic and easy to fold. The greater the proportion of buckwheat flour, the more brittle the blini will be. For optimal results, use about 1/2 to 3/4 cup buckwheat flour, but the rest should be ordinary all-purpose wheat flour.

