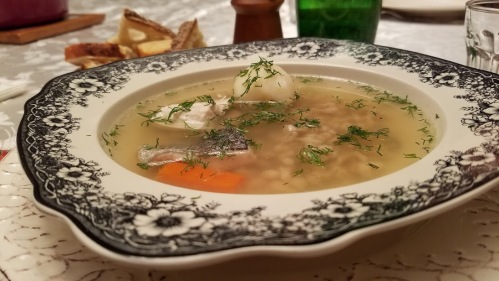
This is a multiple-recipe post. Scroll down for:
- Classic Meat Kotlety
- Pozharskie Kotlety
- Farmer Style Pork Kotlety; and
- Steamed Veal Cutlety With Mushroom Bechamel
The Russian word “kotlety” (singular: kotleta) does not have a true equivalent in English because this kind of dish (and its many, many variations) is not well-known in the English speaking world. There are things that are similar — rissoles, Hamburg steak, Salisbury steak, meatloaf — but these are generally obscure. People sometimes translate “kotlety” as “patties”, but it’s sort of like translating “ravioli” as “dumplings” — broadly accurate, but does not really give you a precise idea of what we are talking about.
The word “kotleta” comes from the French term côtelette de porc — pork chop — and originally had the same meaning. The English word “cutlet” has the same origin. Over the centuries, however, the French côtelette evolved in parts of Europe and Central Asia to mean something very different. The “cutlet” as it appears today in Russian, Ukrainian and certain Central Asian cuisines is basically a portion-sized mini-meatloaf, an oblong-shaped croquette made from ground meat (though fish and vegetarian varieties exist) mixed with mashed bread, or (less commonly) potato or cereals, and pan-friend or oven-roasted. Onions are usually added as well, and raw egg is used as a binding agent. Kotlety may or may not be breaded. They are typically not stewed in any kind of gravy, and are eaten with mustard, ketsup or hot sauce (though one of the recipes below calls for a mushroom gravy).* I will broadly refer to them as “meat croquettes“.
*And, because language evolution is always uneven, the Russian term “otbivnaya kotleta” (“beaten cutlet”) refers to a true cutlet or pork chop that has been tenderized — i.e. “beaten” — before being cooked.
Classic Meat Coquettes
Ingredients:
1 lb unseasoned meatloaf mix (beef, pork and veal)
1/2 lb ground pork
1/3 baguette loaf, sliced, crusts removed
1 cup whole milk
1 egg, lightly beaten
1 medium onion, finely minced
2 tbsp butter
vegetable oil with a high smoking point, such as sunflower or coconut
salt and pepper to taste
Tools:
Heavy, non-stick, oven-proof dish or skillet (cast iron skillet will work best)
1 large non-stick skillet for sauteeing the onions and frying the kotlety
meat grinder or food processor
2 large bowls
Directions:
1. Arrange baguette slices on the bottom of a shallow dish and pour milk over them. Allow to soak for about 25 minutes, turning over half way through.
2. Melt the butter in a skillet and sautee the onions until soft and golden, about 20 minutes. Take off heat and allow to cool.
3. Squeeze as much milk as possible from the soaked bread. Discard the milk. Mash the soaked bread by putting it through a meat grinder or a food processor.
4. Combine the meat loaf mix, the additional pork, sauteed onions, mashed bread and egg in a large mixing bowl, season with salt and generous amounts of freshly ground black pepper, and mix thoroughly. Taste for seasonings by cooking a small portion of the mix in a microwave oven. Cover and chill in the refrigerator for at least 1 hour.
5. Preheat the oven to 350F. Lightly oil an oven-proof dish or skillet, preheat it and keep warm.
6. Add enough vegetable oil to the frying skillet until it’s about 1/4 inch deep. Preheat it until the oil is rippling slightly, but not smoking.
7. Take the meat mix out of the refrigerator, and turn and mix it for a few seconds. Fill another bowl with tepid water and keep it next to the meat container.
8. Dip your hands into the bowl of water and pat lightly with a towel (Hint: this is an excellent trick for preventing ground meat from sticking to your fingers.) Break off a piece of meat about the size of a baseball and roll it between your palms for a few seconds, until it becomes a smooth ball. Then flatten it and shape the sides until the croquette is oblong about about 1 to 1 1/2 inch thick, with a slight dip in the middle (the slight dip will prevent the patty from contracting into a meatball shape as it cooks). Continue making the patties, periodically dipping your hands into the water bowl and patting them, to prevent sticking.
9. Fry the croquettes on both sides on medium-high heat until a crust forms, about 3 minutes per side. (The croquettes need not be cooked all the way through.)
10. Transfer the fried croquettes to the oven-proof dish or skillet, cover losely with aluminum foil and roast in the oven for about 30 minutes.
11. Let stand, covered, for 10-15 minutes before serving.
Chicken Croquettes Pozharsky (Pozharskie Kotlety)
Sometimes, a chef just gets it right — creating a dish so delightful, so elegant, it instantly becomes a classic. To the diner, a Croquette Pozharsky looks deceptively simple — it’s just a chicken patty — but it is the best chicken patty you will ever have, with a delicate, complex buttery flavor that is guaranteed to make it a favorite. Pozharsky is one of the haute classics of the Russian cuisine, the dignified, regal predecessor to the boorish, tourist-oriented monstrosity that is “chicken Kiev”. (I have only one thing to say about Chicken Kiev — well, apart from what I already have: I never make it and neither should you.)
I like stories about the origins of beloved dishes, even if they are apocryphal. Historic or not, they are an indelible part of folklore. About Pozharsky’s croquettes, a couple of stories are told, though both versions agree that “Pozharsky” is the name of the inventor. According to one story, the dish was invented at an inn owned by the Pozharsky family, plying its business in a small provincial town straddling the stage road between Moscow and St. Petersburg. The croquettes were originally made of veal, but the chef eventually switched to chicken due to better flavor. It is these croquettes that are believed to have been mentioned favorably in a private letter by none other than Alexander Pushkin himself. (Wrote the poet in 1826, in verse, because he could rhyme and keep meter as easily as you and I can breathe, and also was a total showoff: “If you have a chance, dine at Pozharsky’s in Torzhok, be sure to order their fried kotlety, and leave delighted.” Sorry, I can translate, but not in verse.)

Torzhok, the ostensible birthplace of Pozharsky’s croquettes. The building that housed the famous tavern (which was still in operation in the 1910’s, almost a century after Pushkin mentioned it in his letter to a friend) is still extant and was extensively restored in 2012.
One day, a royal party stopped at the inn to have lunch ,and the tsar was so impressed with the dish, that he had the inn’s chef disclose his secret, so that the dish could be included in the royal palace menu.
According to another story, the dish was invented in a tavern in Kiev owned by a widow with the last name Pozharsky. Although the tavern catered to a middling clientele, the popularity of the dish attracted the attention of upscale chefs from up north, who prevailed on Widow Pozharsky to disclose her secret, in exchange for attaching her name to the dish.
Either one of those stories could have a grain of truth, and perhaps both supply some historical details. For whatever it’s worth, the unabashed addition of pure fat involved in this dish leads me to believe that it’s probably Ukrainian in origin.
Bottom line: Pozhasky’s croquettes are incredibly delicious, so go ahead and make them. I promise you, you won’t regret the work.
The “secret” to Croquette Pozharskys’ incredible flavor and texture is actually two things.
First, the butter. The recipe involves the addition of finely shredded frozen butter to chilled ground chicken and then keeping the mixture well-chilled up until the time the patties hit the skillet. The tiny butter shavings melt during cooking, evenly basting the meat from the inside. Rather than do my traditional Q&A at the end, I’ll just answer the question you are probably asking right now: adding melted butter and mixing it into the chicken sounds like it might make sense, but for reasons that are beyond my scientific ken, it doesn’t work. You don’t get the right texture or flavor. The only way to get it right is to add frozen shredded butter.
Second, the crumbs. The traditional recipe calls for toasted crumbs made from French bread, and states rather vaguely that they should be “large”. How large is large? There is a tremendous difference of opinion on that point. A lot of people make their “crumbs” as big as stuffing pieces or croutons, so that a finished croquette looks like a hedgehog. I personally don’t like them that big. I think you get a better result if you make your crumbs larger than ordinary store breadcrumbs, but still fine enough that they fuse with the meat to form a crust during cooking. That said, yes, you are making your own crumbs for this one. You can make them a day ahead though.
One more thing. You will need regular butter for the croquette mix and clarified butter for frying. In case you are not sure what clarified butter is: ordinary butter consists of butterfat and milk solids (and some water). If you melt butter in a skillet, you will see it separate into an oil-like substance and tiny white flakes floating at the top. The flakes are the milk solids. Using butter for frying is fine if it’s something that cooks very fast, like eggs; but it does not work for searing meat at high heat, because the milk solids become scorched, adding black specks and burned flavor. But if you scoop out the milk solids and just leave the butterfat, that’s perfect for high-temperature cooking. Clarified butter sears meat evenly and cleanly while imparting that delicious butter flavor. When cooled, clarified butter will solidify, but will be a darker yellow than ordinary butter; homemade clarified butter also tends to be grainy when chilled. Making clarified butter by yourself is a labor-intensive and messy undertaking, so you should just buy some. Be careful doing so, however, and be sure to read the ingredient list. Clarified butter is expensive (the process generates a lot of waste), and many dairy manufacturers will cut it with vegetable spread, hydrogenated oil and other inferior additives. That’s the reason why I never buy Russian clarified butter. You need the real thing — 100% butterfat. Your best bet for finding real clarified butter at a reasonable price is unseasoned cow ghee that you can find at Indian markets.
Ingredients:
2 French-style baguettes, crusts sliced off and reserved for another use
2 lbs ground chicken dark meat
1 medium onion, minced
1/8 lb (1/2 stick) salted butter, frozen overnight
1/4 lb clarified butter (or cow ghee)
1 large egg, lightly beaten
1 tsp ground white pepper
1 cup half-and-half
salt to taste
Tools:
fine shredder, placed in the freezer overnight
1 large pre-chilled bowl
heavy non-stick oven-proof pan or skillet
chilled serving spoon or spatula (if using)
Directions:
Stage I: The Breadcrumbs
1. Preheat the oven to 325 F.
2. Set aside 1/2 of one baguette.
3. Cut the remaining 1 1/2 baguette into cubes a bit smaller than salad croutons (about 1 cm).
4. Arrange the bread cubes in a single layer on an oven sheet and toast in the oven until hard and crunchy, but not darkened, about 10-15 minutes. Cool, uncovered, to room temperature.
5. Pound the croutons in a bowl with a pestle, or seal them in a plastic bag and crush with a rolling pin, until you have bread crumbs somewhat chunkier than ordinary store breadcrumbs, but fine enough to be “crumbs”. Homemade breadcrumbs will be of uneven size. Don’t crush them to the point of pulverizing them in order to get something uniform, you need the crumbs to be fairly large.
6. Transfer to a completely dry container and store in a dark, cool place.
Stage II: Prepare the chicken mix.
1. Melt 1 tbsp of clarified butter in a skillet, add the onion and sauté until soft, golden and just beginning to crisp, about 30 minutes. Take off heat, drain on paper towels and let cool.
2. Slice the remaining baguette and soak in half-and-half for 30 minutes. Squeeze out the liquid and mash the bread until smooth or put it through a meat grinder.
2. In a pre-chilled bowl, combine chicken, sautéed onion, egg, white pepper and mashed bread. Season with salt and mix thoroughly. Test for salt by cooking a small amount in a microwave and tasting it. Chill in the refrigerator for 2 hours.
3. Wrap one end of a frozen butter stick in a paper towel. Using a freezer-chilled shredder, quickly shred the butter over the meat. Mix to combine using a chilled spoon or spatula. (You can use your hands to mix, but if you do it that way, make sure to dip your hands in some ice beforehand, to prevent your body heat from softening or melting the butter.)
4. Cover the mix and chill in the refrigerator for 1 hour.
Stage III: Prepare and Cook the Croquettes
1. Preheat the oven to 350 F.
2. Brush the oven-proof pan or skillet with clarified butter and place it in the oven.
3. Add some breadcrumbs to a shallow bowl or platter.
4. Melt a generous amount of clarified butter in a non-stick skillet.
5. Rinse your hands with cold water. Take the chicken mix out of the refrigerator and turn in the bowl a few times.
6. Periodically rinsing your hands with cold water, shape oblong patties about the size of a hockey puck (but oblong) and roll them in the crumbs until fully coated.
7. Sear the patties at medium-high heat until a golden-brown crust forms, about 3-4 minutes per side. Make sure not to crowd the patties in the skillet.
8. Transfer the seared patties to the oven pan or heavy skillet and roast another 30 minutes or so. Cover the pan loosely with aluminum foil to prevent over-roasting.
Stage IV: Serve.
1. Take the pan out of the oven, transfer the patties to a warmed platter, cover with foil and let stand for about 15 minutes before serving.
2. Garnish with with parsley and halved cherry tomatoes.
3. Serve with truffled mashed potatoes.
Farmer Style Pork Croquettes
“Farmer-style” (po krestjanski) dishes in Russian cuisine invariably involve cooking things in pork fat. The more traditional version of this recipe calls for using salo — cured fatback; incorporating the cracklings left over from rendering the fat into the croquette mix, and frying the croquettes in the rendered salo fat. That’s true farmer style for you! It is, however, a bit too much for modern sensibilities, given that most of us don’t burn 6000 calories a day doing 10 hours of back-breaking labor, and would like to live past the age of 45. Accordingly, I replace salo with bacon and cook the croquettes in vegetable oil. Shredded potato replaces mashed bread in this recipe.
N.B.: Croquette mix works best when it’s chilled. One option is to prepare the mix a day ahead and refrigerate it overnight.
Ingredients:
2 lbs ground pork
1 lb Russian or Polish-style mild steamed bacon, finely chopped
1 large starchy potato, such as Idaho
1 medium onion, finely chopped
1 tbsp freshly ground black pepper
1/2 tsp fennel seed, toasted and ground
1 tbsp powdered marjoram
4 eggs
1/4 cup whole milk
1 cup all purpose flour + more if needed
1 cup unseasoned bread crumbs
minced chives
salt to taste
vegetable oil
Directions:
1. Boil the potato with skin on in lighly salted water until it can be easily pierced with a fork. Remove from the pot, let cool, peel and finely shred.
2. Warm the bacon in a skillet until it begins to render fat, then add the onion. Saute over medium-low heat, stirring frequently, until most of the fat is rendered and the onion is a deep golden color, at 35 minutes. Pour off excess fat and drain the bacon-onion mixture on paper towels.
3. Combine ground pork, bacon, onion, shredded potato, 1 lightly beaten egg, fennel seed, marjoram and 1/2 tbsp ground black pepper. Add a generous pinch of salt and mix to combine. Taste the mixture for salt by cooking a teaspoonful in a microwave, adding more if necessary. Cover or wrap the container and refrigerate for at least 2 hours.
4. Preheat the oven to 350F.
5. Whisk the remaining three eggs with the milk in a shallow bowl until smooth and slightly foamy.
6. In a separate shallow bowl, season the flour with a pinch of salt and the remaining 1/2 tbsp ground black pepper.
7. Pour the bread crumbs into a third bowl.
8. Warm approximately 1/4 inch of vegetable oil in a heavy, non-stick skillet.
9. Remove the croquette mix from the refrigerator and mix and turn for a few seconds. Break off pieces about the size of baseballs and form oblong croquettes. Dredge them in flour, dip in the egg mixture and roll in bread crumbs. Fry in oil until golden, about 3 minutes per size.
10. Arrange the pan-fried croquettes in a lightly oiled, non-stick roasting pan, cover loosely with aluminum foil and roast in the oven for about 40 minutes, flipping them over half way through.
11. Remove the croquettes to a warmed serving dish, cover loosely with foil and let rest for about 10 minutes.
12. Serve sprinkled with chives and bacon crumbles.
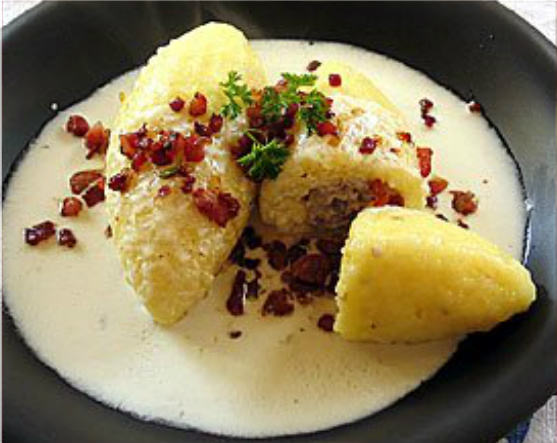
Steamed Veal Corquettes with Mushroom Bechamel

Ingredients:
2 lbs ground veal
1/4 French baguette, crusts removed, cubed and soaked in whole milk
1 egg, lightly beaten
1 tsp ground sage
salt and pepper to taste
vegetable oil
1 lbs crimini mushrooms, rinsed and patted dry
1 cup dry sherry
1 1/2 cups heavy cream
1 tbsp butter
1 tbsp all-purpose flour
3-4 parsley stalks
a few lighly crushed black peppercorns
salt
1/3 tsp ground white pepper
pinch of nutmeg
1 bayleaf
Directions:
1. Drain and squeeze the bread. Mash it finely or grind in a meat grinder.
2. Combine the veal, mashed bread, egg and seasonings. Wrap the mixture and refrigerate for at least 2 hours.
3. Prepare a deep skillet filled with simmering water and insert an unfolded steamer basket. Brush lightly with oil. Form oblong croquettes and steam, covered, for about 45 minutes.
4. Pat the steamed croquettes dry and sear them in vegetable oil on both sides until a light crust forms, about 3-4 minutes per side.
5. Separate the mushroom caps from the stems. Set the caps aside. Coarsly chop the stems. Bring the sherry to a simmer and add the mushroom stems. Boil until the wine has been reduced by about 2/3. Add the cream, bring to a simmer, add a pinch of salt, parsley stalks, peppercorns and bayleaf and steep, covered, over a very low flame for about 1 hour. Strain, discard the solids, and keep the liquid warm.
6. Finely slice the mushroom caps. Sautee in butter, stirring frequently, until the liquid drained from the mushrooms has completely evaporated, about 25 minutes. Sift flour over the mushrooms, and cook, stirring frequently, for an additional 20 minutes. Slowly pour in the reduced wine and then the cream, while whisking vigorously. Cover the sauce and let simmer over a low flame for 30 minutes. If too thick, dilute with a bit more cream (do not use milk). Finish with a pinch of nutmeg.
7. Ladle the gravy over the croquettes before serving.
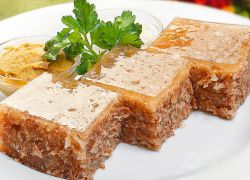 Aspic is a very distinctive Russian dish, and I highly recommend it.
 Russian meatballs incorporate rice and are served without a side dish.